Cupcake Rose Tutorial!
Hello everyone in cake decorating land! I am back with another wonderful tutorial from Chef Nicholas Lodge! This one I am pretty excited about, I really love the design and how easy it is to recreate at home or in your bakery. Friends… I’m talking about the Rose Cupcake! Chef Nicholas has taken a simply cupcake and turned it into an incredibly life-like, edible rose. Bridal showers, weddings, Mother’s Day, baby showers, elegant ladies lunches, gardening club meetings- these cupcakes are perfect for these occasions! How about I stop with the chit-chat and just get to the telling you how to make your own rose cupcake part?!
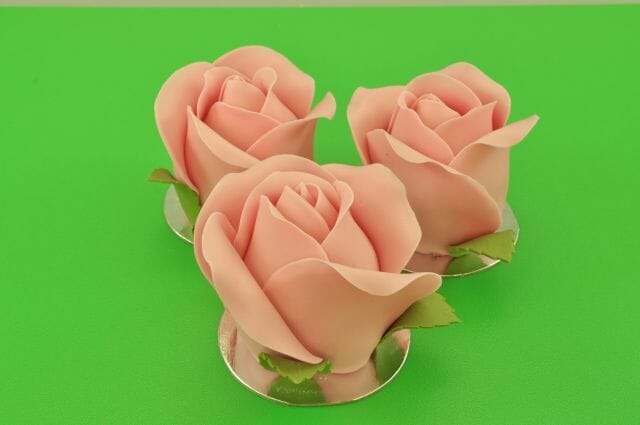
Photo: S. Ewing
I’ll start with the supply list, and many of you (being cake decorators and sugar artists yourselves) may have many of the tools needed for these little beauties. Next we will dive right into transforming a humble cupcake into a stunning rose! Finally we will cover how to create the leaves for a final touch. Oh! I am so excited!
Supplies
Prepared cupcake
Buttercream
Filling of choice (optional)
Renshaw Decor~ice™ Ready-to-Roll Fondant (color of choice)
Gumpaste (Chef Nicholas’ recipe or Renshaw Decor~ice™ Gumpaste)
Mini cake Board (3.5 Inches)
Scissors
NL Foam Flower Pad or NL No Flip Foam Flower Pad
FMM Large Rose Petal Cutter Set
PME XL Rose Leaf Plunger Cutter
Moss Green or Leaf Green Gel Color
Pasta Machine Attachment and KItchenaid Mixer (this is what Chef Nicholas used to rolled out his fondant and gumpaste)
Cupcake Rose Steps
1. Begin by removing the paper wrapper from the cupcake. Trim the top edge of a cupcake with scissors. Turn the cupcake over and cut a cavity using an apple corer. Attach the cupcake to a mini 3.5 inch cake board with a bit of buttercream. Fill the cavity of the cupcake with buttercream or filling of your choice. Squash the top to create a closed shape and then crumb coat the outside of the cupcake using the NL Mini Palette Knife. Pipe a swirl on the top of the cupcake then smooth the buttercream out with the NL Mini Palette Knife to create an egg shape.
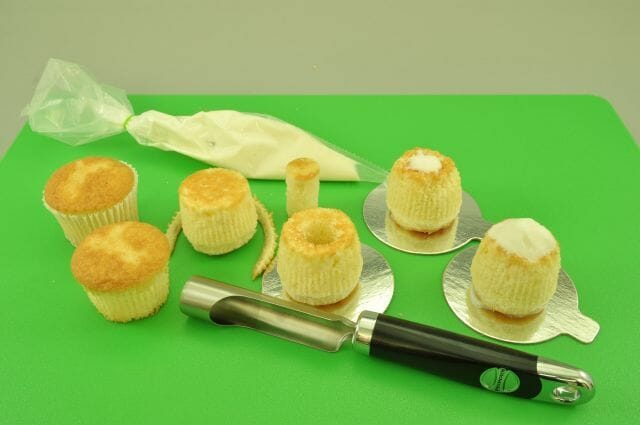
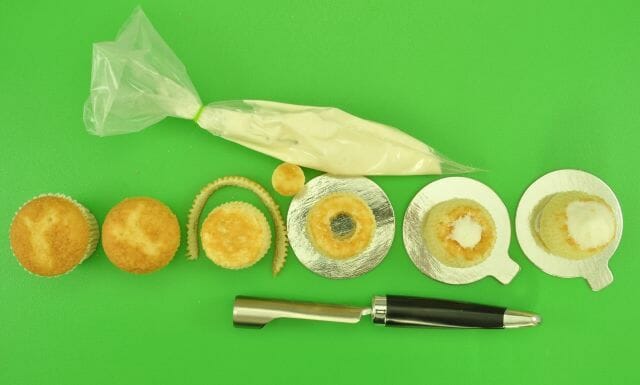
Two views of the different prep stages for the cupcake. Photos: S. Ewing
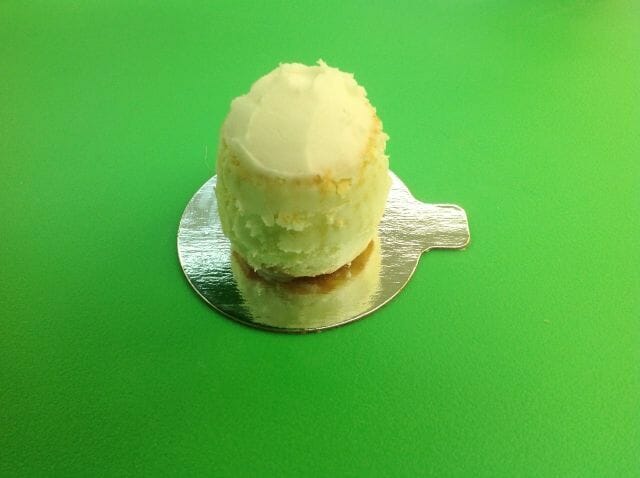
Cupcake cake covered with a crumb coat and formed into an egg shape. Photo: S. Ewing
2. Roll out approximately 4 oz. (115g) of Renshaw Decor~ice™ Ready-to-Roll Fondant (in the color of your choice) using the No.1 setting on your pasta machine. Once the rolled fondant has been rolled out, use the FMM Large Rose Petal Cutter Set to cut out three small and three medium petals. Place each of the petals into the NL Multi-Flap then work the top half of the rounded edge of each petal with the XXL Ball tool or rounded edge of a rolling pin to thin the petals.
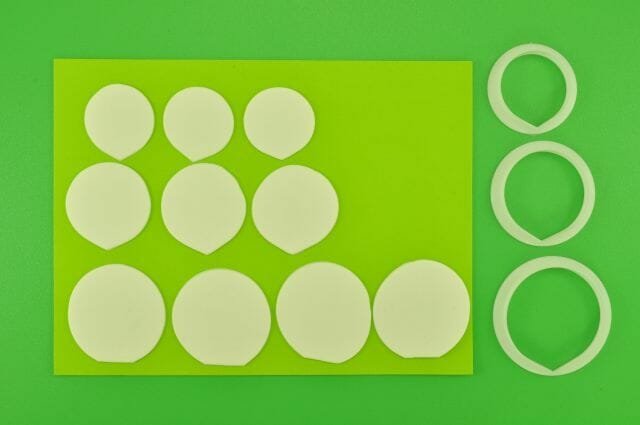
This shows small, medium, and the large petals (to be discussed below) from the FMM Large Rose Petal Cutter Set. Photo: S. Ewing
3. Attach one small petal to the cupcake, spiraling the petal around the cupcake). Next attach the other two small petals, tucking each petal into each other and pinching each petal back a little, using watered down piping gel (1 part piping gel: 3 parts water) as needed. After the small petals have been applied to the cupcake, attach the three medium petals, tucking each inside of the previous petal, pinch to shape.
You can see how the middle petal spirals and the outer two petals tuck into each other here. Photo: S. Ewing
4. Roll out the remaining fondant and cut out four of the largest petals. Cut off 1/4 inch of the pointed edge of petal (this is so that each petal will fit nicely against the flat edge of the board). Place these petals into the NL Multi-Flap and soften the edges with the XXL Ball Tool or the rounded edge of a Rolling pin, as with the small and medium petals. Remove a petal from the NL Multi-Flap and stretch it slightly to elongate the shape. Attach the petal to the base of the cupcake, one at a time, tucking each petal into the previous one (as with the small and medium petals). Press the petals into the base of the cupcake using the NL Mini Palette Knife, and pinch back the edges.
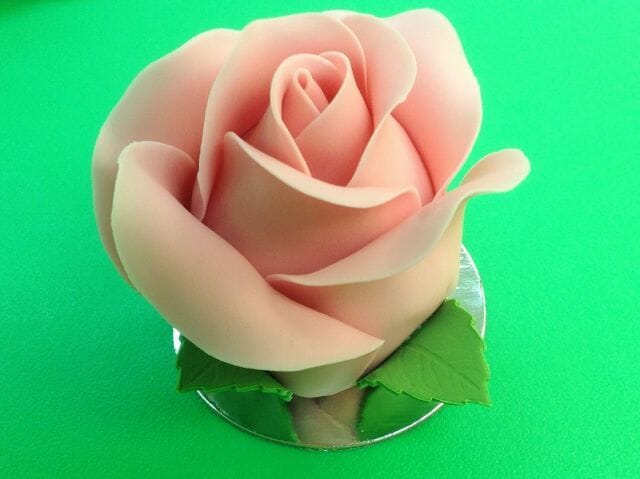
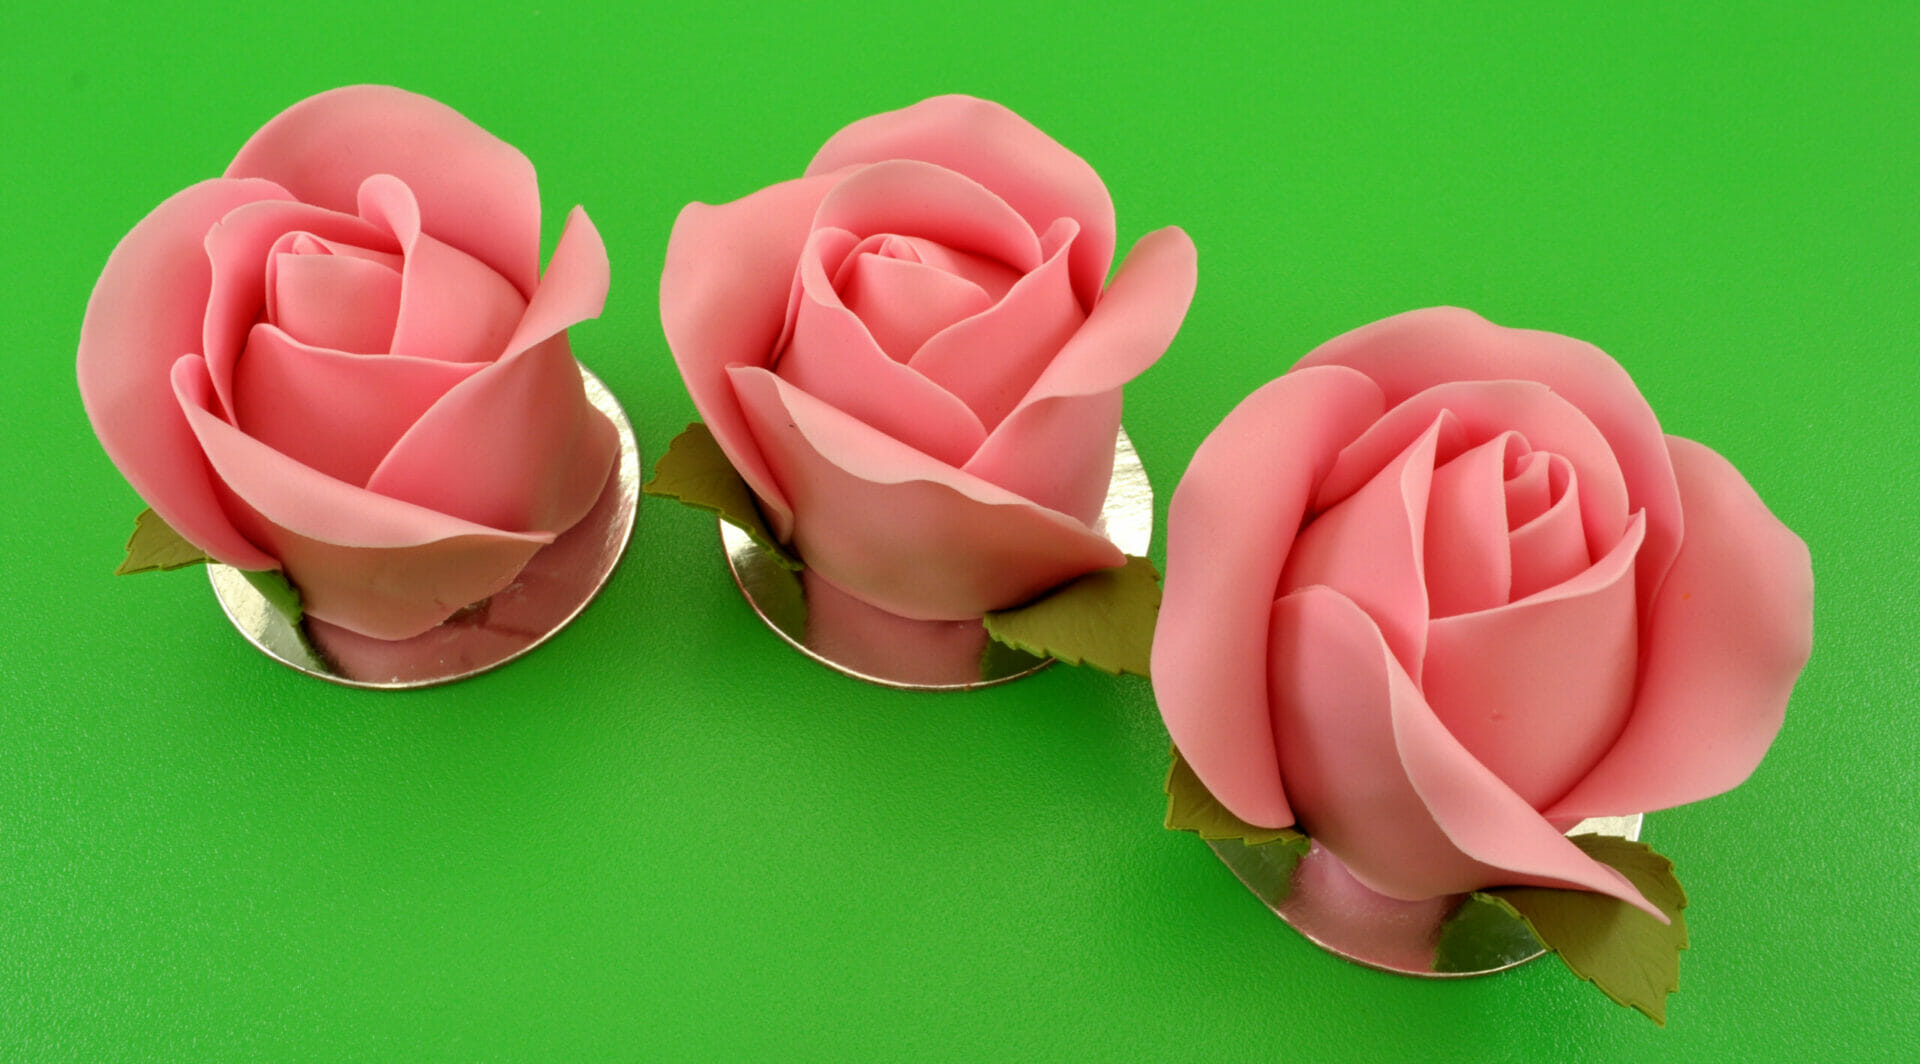
Cupcakes with all nine petals attached.
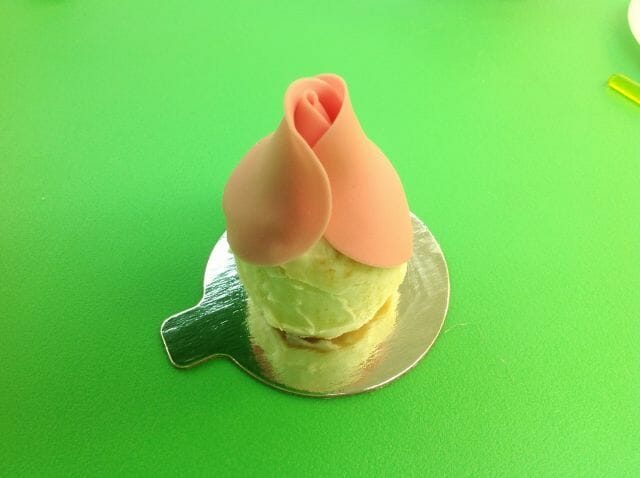
5. To make the rose leaves, take 50/50 Moss Green or Leaf Green Paste (half gumpaste and half rolled fondant), or modify green Renshaw Decor~ice™ Ready-to-Roll Fondant, and roll out on the No. 3 setting on the pasta machine. Cut four leaves using the PME XL Rose Leaf Plunger Cutter on the hard (green side) of the NL Foam Flower Pad or NL No Flip Foam Flower Pad. Dry the leaves for a few minutes on the NL Multi-former to hold the shape. Once the leaves have a dried a bit, attach to the cupcake rose with full strength piping gel at the base of the petals.
That’s it! How easy was that? How easy was that for such a stunning, show-stopping finished product! Assembling all the tools will probably take you longer than actually creating each little rose! Now, I have seen entire cakes made into huge roses, but this is way better. Why? Because with a cake sized rose you will need so many more petals, oh, and there aren’t any petal cutters big enough! You would have to make templates, by hand, for each different size petal you need. All you need here is a few cutters and a bit of fondant and gumpaste! Oh, and if you want to see what the cupcake looks like on the inside, here ya go:
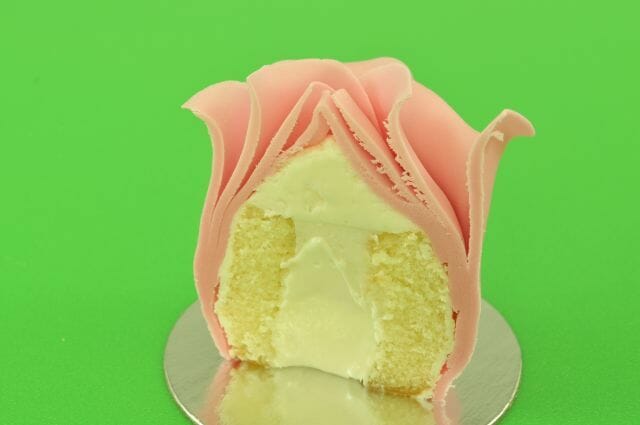
It’s even pretty on the inside! Photo: S. Ewing
I hope you enjoyed the tutorial Chef Nicholas created on Rose Cupcakes. It is our hope to share more tutorials in the future, and I would love to know what you think of this one! Will you be attempting to create your own garden of rose cupcakes? I’d love to see photos of your roses if you do! Oh, and if you would like to purchase any of the tools used in this tutorial, please click the name of each tool in the supply list. ISAC does carry the mini 3.5 inch cake boards in our store, but we do not have them on our website; if you would like to order them just give us a call at 1-800-662-8925.
Sweetly yours,
Stephanie
Don’t just follow our blog! Follow Chef Lodge on Facebook, Instagram, Pinterest, Twitter, Flickr, and Tumblr!

Winner of the 2015 Craftsy Blogger Award for Best Craftsy Cake Decorating Instructor Blog